Your bicycle deserves proper care and attention – regular maintenance is the key to keeping your bike reliable, safe and performing at its best. From essential bicycle maintenance tools and pre-ride checks to detailed inspections, cleaning and lubrication, everything you do to care for your bike contributes to extending its lifespan.
This guide walks you through the ABC check before going through the M-check. After each check, we’ll explain how to care for and maintain that particular component. By the end of this guide, you will know how to keep your bike in the best condition possible.
Tools
Before looking at the checks and care routine, you should be aware of the tools that will make maintenance easier. Having the right tools makes a significant difference when it comes to caring for and maintaining your bicycle, so that it can remain in top condition.
Tools for Home Maintenance
Having precise tools will make repairs at home a lot easier than if you were to use a multi-tool for everything. We recommend you keep the following tools at home:
Track/floor pump with pressure gauge
This tool guarantees accurate inflation.
Shock pump
This is an essential if you have a mountain bike with air suspension as it allows you to fine-tune the suspension pressure.
Full size Allen and Torx key sets
These offer better control and torque than their portable equivalent.
Torque wrench
This is a must-have for bikes with carbon components as it helps prevent damage by avoiding overtightening.
Chain wear gauge
This allows you to detect chain stretch early so you prevent damaging the cassette.
Chain tool (breaker)
This tool is indispensable for splitting and rejoining chains.
Adjustable wrench
Ideal for pedals, axles and other hardware.
Cleaning kit
A good kit will include a degreaser, soft brushes, microfiber cloths, a bucket and bike-specific lubricant.
Portable Tools for Cycle Rides
As well as keeping bike tools at home, carrying the essential tools with you means you’ll be well equipped to handle repairs on the roadside, turning a potential disaster into a minor inconvenience. Pack these into a saddlebag, a jersey pocket or a rucksack:
Multi-tool
Otherwise known as a compact lifesaver, a multi-tool is complete with Allen keys, screwdrivers, and some even have chain tools. A bicycle multi-tool is great for adjustments mid-ride.
Tyre levers
Allows the removal tyres. If you have a flat tyre, you’ll need a tyre lever to remove it.
CO2 inflator or mini pump
They do the same thing, but CO2 inflators are fast and efficient; mini pumps are reliable.
Spare inner tube
Make sure your spare inner tube matches the dimensions of your tyres. If you’re unsure of the size you need, check the tyre sidewall.
Patch kit
If you’ve already used a spare inner tube, then you can use a patch kit to fix up any punctures.
Chain quick link
If your chain breaks when cycling, a chain quick link will be helpful in getting you back on the road.
ABC Quick Check
This is a faster inspection than the M-check and covers the basics in under a minute. It would be a good idea to do the ABC check pre- and post-ride so you can catch any issues before they become troublesome.
Air – Squeeze the tyres to check their pressure. If they feel soft, you need to inflate them.
Brakes – Squeeze both the levers to test their responsiveness.
Chain – Spin the pedals and observe the chain. Is it dry, gritty or too loose? If yes, your chain needs addressing.
The M-Check: A Full-Body Bike Assessment
It’s called the M-check because it follows the ‘M’ shape you follow when tracing inspection points across the bike frame. This is a thorough inspection, so it’s not necessary to do it before every ride, but it’s advised to do it weekly if you’re regularly in the saddle or before long rides.
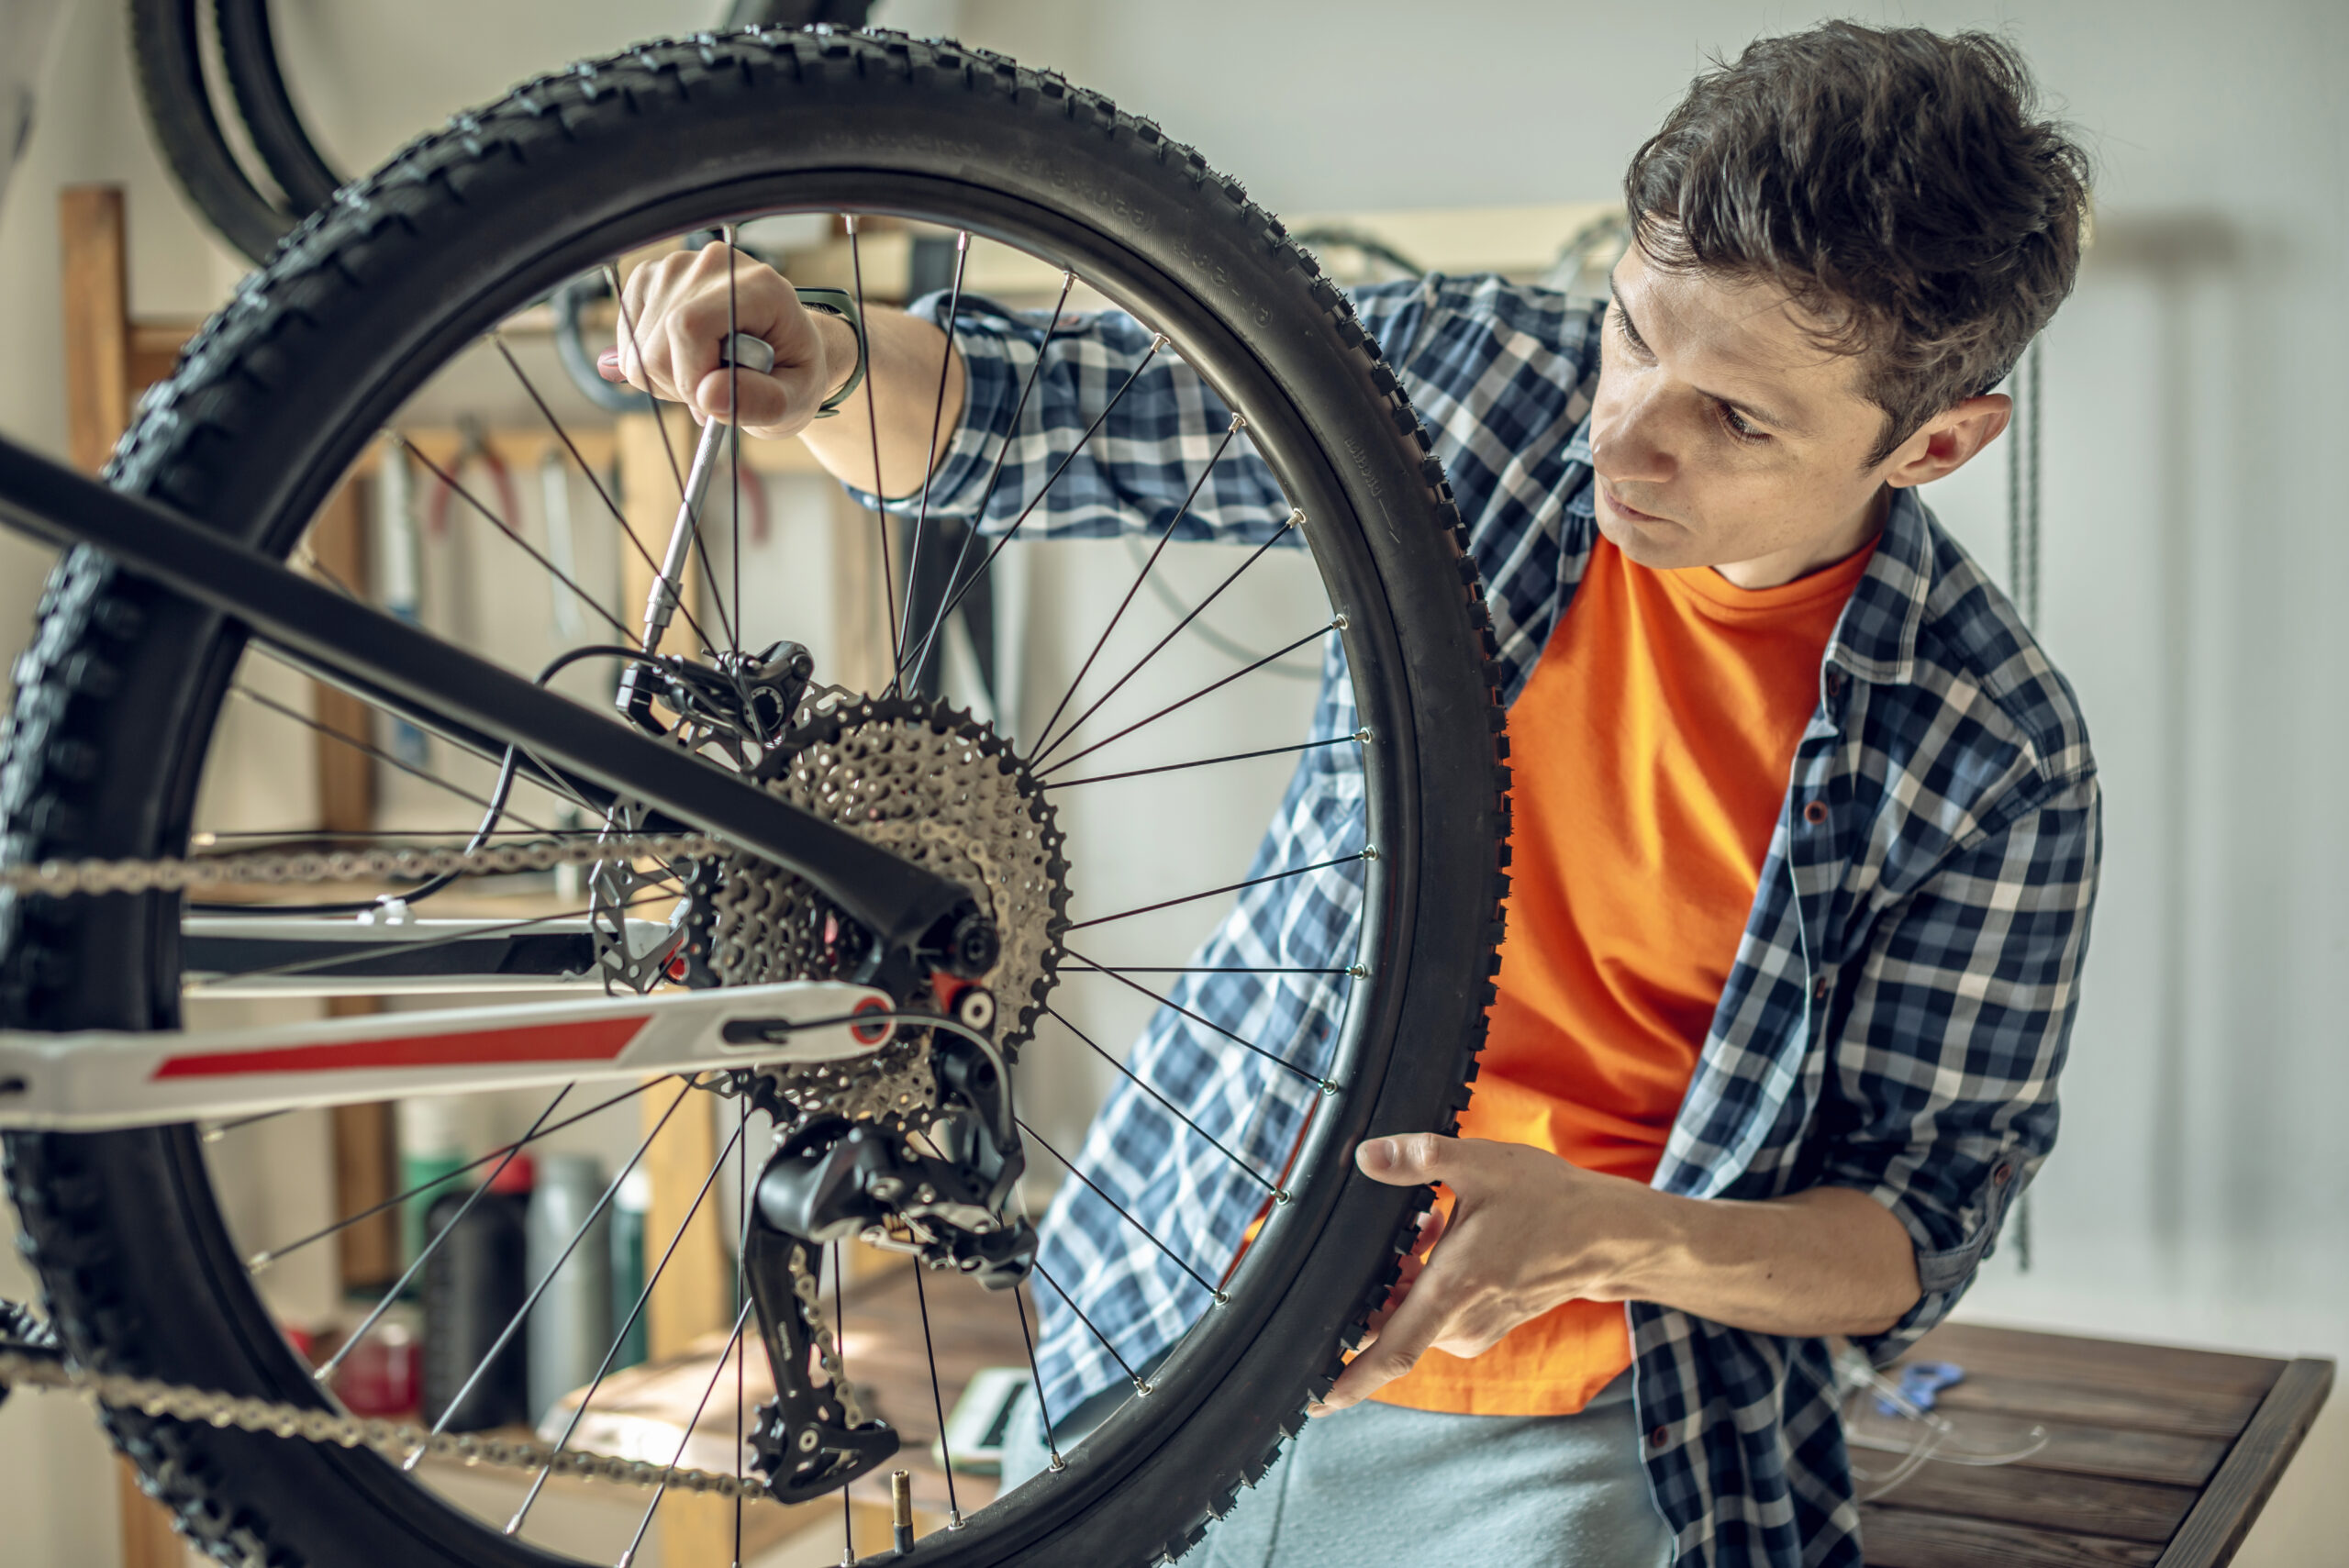
M-Check One: Wheels and Tyres
The wheels and tyres are the first inspection in the M-check. Check for tight spokes, even wear, proper inflation and any embedded debris.
Wheel Truing
Wobbly wheels are an accident risk and will make your bike ride less enjoyable. To check this, spin the wheel. If you notice any side-to-side movement, you can true the wheel. You need to tighten or loosen the spokes to do this.
To adjust spoke tension, you need a spoke wrench. Tightening one side of the wheel will pull it back into alignment but be careful not to over-tighten. If you’re unsure or the wheel is seriously out of true, it’s best to consult a professional at your local bike shop.
Essential Tyre Maintenance
As your bicycle tyres are the point of contact between you and the road it’s important to keep them in good shape.
Tyre pressure is key. It’s recommended you check tyre pressure weekly to make sure it matches the recommended PSI – this is embossed on the tyre sidewall. Proper inflation simultaneously maximises safety and minimises the risk of punctures or blowouts.
Riding with under-inflated tyres can cause sluggish performance and increase the chance of pinch flats. If your tyres are too soft, then you will notice that damage becomes more frequent. The tyre’s shock absorption will also be poorer, reducing your handling control.
You also need to inspect your tyres for cracks, bulges, or excessively worn tread. If you notice any visible damage or the tread looks flat and uneven, you need to replace the entire tyre. If the casing or inner tube is exposed, then replacing the tyre is a high priority.
How Do I Fix a Flat Bicycle Tyre?
Flats happen, even with proper tyre care. Punctures can be repaired yourself, and here’s how:
- Remove the Wheel: Start by loosening the quick-release lever or unscrewing the wheel nuts. If you’re unsure about how to use the quick release, see the detailed steps below.
- Take Out the Tube: Once the wheel is off, remove the tyre by using the tyre levers. Pry one side of the tyre away from the rim, and then use the second lever to work your way around the rim until the tyre is fully off.
- Patch or Replace the Tube: Once the inner tube is out, check for the puncture by inflating the tube slightly. If you prefer to patch it, apply the self-adhesive patch from your repair kit. Alternatively, you can replace the entire inner tube if the damage is extensive.
- Reinstall the Tyre: Slide the repaired or new tube back inside the tyre. Carefully seat the tire’s bead back onto the rim. Once it’s in place, inflate to the proper pressure.
- Reattach the Wheel: Put the wheel back into the frame and make sure everything is correctly aligned. Tighten the quick release or wheel nuts, reconnect the brake (if necessary), and check that the wheel is secure and spins freely.
M-Check Two: Brakes
With this second m-check, you’re looking to if the brake pads are aligned, if they’re not worn and whether the cables are fraying. You also need to test their stopping power. There are two different types of bicycle brakes that require different care.
Rim Brake Care
Rim brakes are most common on road and hybrid brakes.
Check pad alignment: Pads should hit the rim – not the tyre.
Inspect for wear: Replace pads when they’re worn unevenly or the grooves are almost gone.
Tighten cable tension: If levers pull too close to the handlebars, it’s time to adjust.
Lubricate pivot points: Use a small amount of oil to keep things moving smoothly (but avoid pads and rims!).
Inspect cables: Frayed or rusted cables should be replaced immediately.
Disc Brake Maintenance
Disc brakes are typically found on modern mountain and gravel bikes.
Clean the rotors: Use isopropyl alcohol or disc brake cleaner – never touch rotors with bare hands.
Inspect brake pads: Replace if they’re less than 1.5mm thick.
Bleed hydraulic brakes: If braking feels spongy, it might be time to remove air from the system.
Avoid contamination: Keep lubricants, degreasers, and even fingerprints away from rotors and pads.
Never pull the brake levers with your front wheel. This might lead your callipers to clamp shut and will make reinstalling the wheel a lot harder.
M-Check Three: Cranks and Pedals
Confirm the bolts are secure and there’s no play in the bottom bracket.
M-Check Four: Drivetrain
Look for rust or grime on the chain and check the derailleur for smooth shifting.
Gear Maintenance
Smooth gear changes make cycling more efficient and more enjoyable. If your gears are skipping, making suspect noises, or they’re hesitating, don’t worry, as it’s often an easy fix. On the whole, most minor gear issues can be solved using the barrel adjusters, so no tools are needed.
Rear Derailleur
If your chain won’t shift up to bigger gears then you need to turn the barrel adjuster anticlockwise to increase cable tension.
If your chain won’t shift down to smaller gears then you need to turn the barrel adjuster clockwise to reduce tension.
Front Derailleur
Adjust this the same way as the rear derailleur based on how the chain is shifting between chainrings.
If the shifting is sluggish or the chain rubs, fine-tune the barrel adjuster until the transitions are clean.
Chain Maintenance
Your bicycle chain gets put under a lot of stress each time you cycle, and it pays to care for it as replacements can be costly.
Chain Inspections
To check chain wear use a chain checker tool and measure chain elongation. If the tool shows more than 0.5% elongation, it’s time to replace the chain. A worn chain can cause wear on your cassette and chainring.
You also need to periodically clean your chain to remove dirt and grime, especially if you’ve been cycling in muddy or wet conditions. Use a chain cleaning tool or a rag to wipe down the links. From here you can apply a suitable lubricant.
How to Fix Chain Drops
If the chain has fallen off the cassette or chainrings then the high/low limit on the derailleur might need adjustment. These stop the derailleur from moving too far in either direction. Only adjust this if you’re still having issues after tuning the cable.
How to Fix a Broken Bicycle Chain
Broken chains are rare, but it can happen. To fix a broken chain, you need a chain tool, or a multi-tool with a chain breaker, a quick link and a spare chain link.
Repair Process
- Find the Broken Link: If your chain is broken, locate the damaged link. A quick link can come in handy here.
- Use a Chain Tool: With the broken link identified, use the chain tool to push out the rivet and remove the damaged section of the chain.
- Join the Chain: Insert a quick link or use a chain tool to join the chain back together.
- Test the Repair: Rotate the pedals and check for any stiffness or odd movement. If all seems good, you’re back in action!
Note: Never rest your bike on the drivetrain side to protect your derailleur hanger and preserve accurate shifting.
M-Check Five: Saddle and Seatpost
Make sure the saddle and seatpost are properly positioned and tightened.
M-Check Six: Handlebars and Steering
Turn the bars to feel for any resistance or obstruction and test the headset’s play.
Altering Brake Lever Reach
Positioning the brake levers properly can increase the control you have as well as reduce fatigue. To adjust the reach, use the barrel adjuster on the lever or cable housing to move the lever in or out. If you have smaller hands, reduce the reach by turning the adjuster inwards. Always test it out to make sure the lever isn’t pulling all the way back to the handlebars. After adjusting, tighten the locknuts to keep the settings in place.
Usually, hydraulic brakes self-adjust but you might still need to tweak lever reach with the integrated screw or dial.
M-Check Seven: Suspension (if applicable)
Compress both the front and the rear to confirm smooth travel.
Now you’ve inspected and addressed mechanical issues during the M-Check, it’s time to focus on cleaning and lubrication. They not only enhance your bike’s appearance but also play a crucial role in reducing friction, preventing corrosion, and extending the life of its components.
Why Does Bicycle Lubrication Matter?
Lubricating your bike reduces friction, prevents corrosion and improves overall performance as well as the lifespan of your bike. However, it’s important to be aware that applying too much lubricant can attract dirt. Always apply moderately and wipe off the excess.
Choosing the right lube is also important. If you’re headed out for a dry and dusty ride, then you need a dry lubricant. It applies wet and dries into a film. If you’re set to have a wet and muddy bike ride, then you need a wet lubricant. It’s more durable but does attract more grime, meaning you need to clean your bike and relube after a rainy bike ride.
How to Lubricate Key Components
Chain Lubrication
- Clean the chain with degreaser if it’s dirty.
- Apply one drop per link on the bottom section of the chain.
- Pedal backward slowly to distribute.
- Let it sit for 5–10 minutes.
- Wipe off excess with a dry cloth.
Derailleur Lubrication (Front and Rear)
- Focus on pivot points and jockey wheels.
- Shift through the gears while pedaling.
- Apply a small amount to the moving parts.
- Wipe away any extra to prevent buildup.
Brake and Gear Cable Lubrication
- Unseat the outer cable from the stops.
- Clean the inner cable with a cloth.
- Apply light oil along the exposed section or use a cable oiler.
- Reseat and check for smooth shifting or braking.
Regular Bike Cleaning
Bike cleaning is an essential part of maintenance that goes beyond keeping your bike looking nice. It helps extend the life of components and prevents damage caused by dirt, grime, and the build-up of rust which all cause premature wear. Regular cleaning is especially crucial after riding in muddy or wet conditions.
Wipe down your bike after every ride taking car to address the drivetrain and frame in particular. Dirt and grime accumulate on the chain quickly, especially if you’ve been cycling in bad weather. Use a cloth or rag to wipe the chain clean after each ride.
Use a brush to clean the chainrings, cassette, and derailleur pulleys.
To clean the frame, use a mild soap solution and a soft sponge. Avoid using a pressure washer, as it can damage the bearings and seals.
Protect Your Ride with Bicycle Insurance
A well-maintained bike is a more enjoyable and reliable bike. By keeping an eye on your tyres, chain, and other essential components, you’ll reduce the chance of unexpected breakdowns and subsequent costly repairs.
However, even with a rigorous and regular bike maintenance routine, accidents can happen, as well as theft. For peace of mind, invest in cycle insurance and you’ll enjoy every bike ride without worry.